 Save
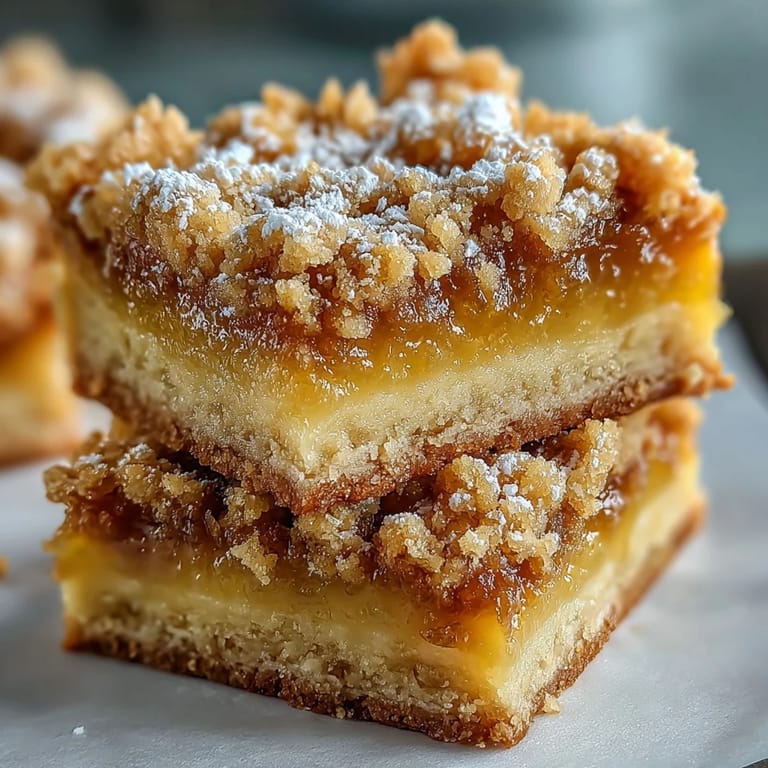
Save Last spring, my neighbor brought over an armful of lemons from her tree, practically begging me to take them off her hands. The kitchen filled with that sharp, clean scent as I zested them, and I knew something bright and buttery was the only way to go. These bars became my go-to for that weird in-between season when you want something cozy but also need a little sunshine on your plate.
I brought a batch to a book club meeting once, and suddenly everyone was more interested in discussing the bars than the actual book. One friend confessed she ate three before even realizing it, and another asked if I could start a side business selling them. That is always the moment a recipe earns permanent keeper status in my house.
Ingredients
- 1 cup all-purpose flour: This becomes both your crust and crumb topping, so measure it carefully
- 1/2 cup granulated sugar: For the crust mixture, keeping it subtle so the lemon can shine
- 1/2 teaspoon baking powder: Gives the crust a little lift so it is not too dense
- 1/4 teaspoon salt: Essential to balance all that sugar and brightness
- 1/2 cup unsalted butter, melted: Use real butter here, nothing else gives that right texture and flavor
- 2 large eggs: Room temperature eggs blend into the filling more smoothly
- 1 cup granulated sugar: For the filling, creating that luscious curd-like consistency
- 1/4 cup fresh lemon juice: Fresh is non-negotiable, bottled juice just tastes flat
- Zest of 1 lemon: This is where all the aromatic lemon magic lives
- 1/4 cup all-purpose flour: Just enough to set the filling without making it cakey
- 1/2 teaspoon baking powder: Helps the filling puff slightly while baking
- Pinch of salt: Wakes up all the flavors and keeps it from being cloying
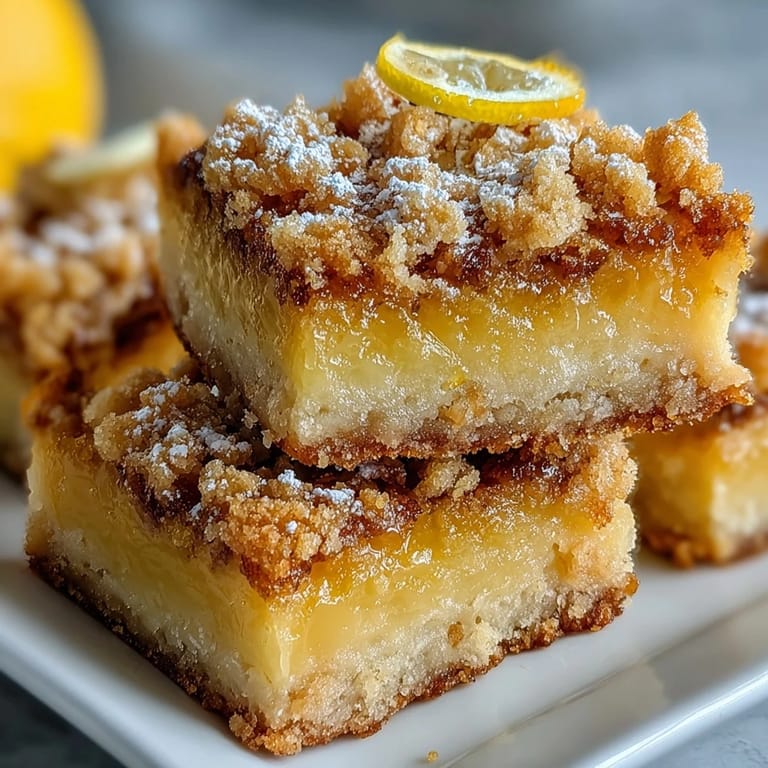
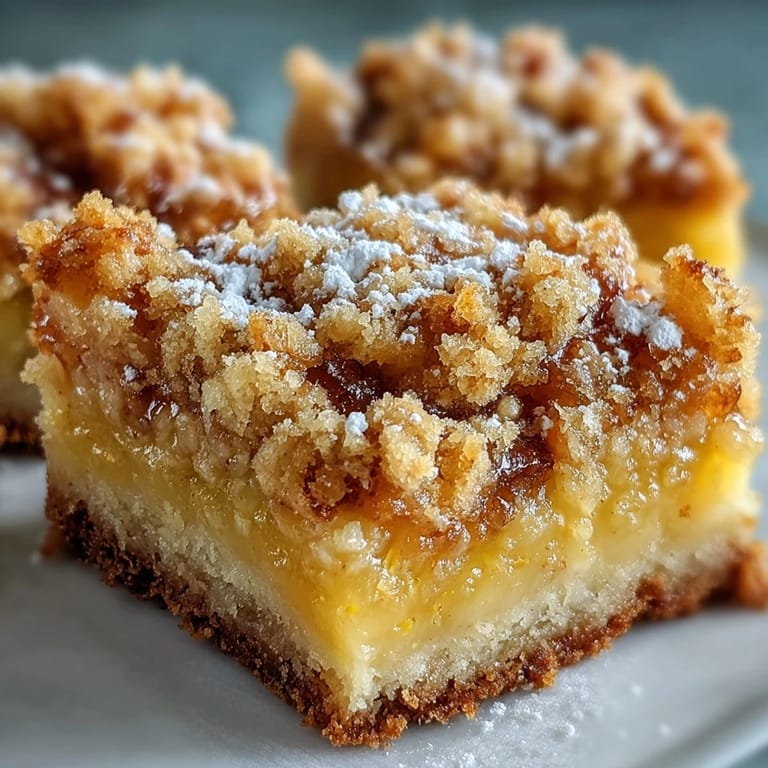
- Powdered sugar for dusting: The final touch that makes them look bakery-worthy
Tired of Takeout? 🥡
Get 10 meals you can make faster than delivery arrives. Seriously.
One email. No spam. Unsubscribe anytime.
Instructions
- Preheat and prep your pan:
- Set your oven to 350°F and grease a 9x9 pan, or line it with parchment paper for the easiest removal later.
- Mix the dry crust ingredients:
- Combine the flour, half cup sugar, baking powder, and salt in a medium bowl until well blended.
- Add the melted butter:
- Pour in your melted butter and stir until the mixture is moist and crumbly, with some pea-sized bits remaining.
- Reserve some for topping:
- Set aside about half a cup of the crumb mixture, then press the rest firmly and evenly into your prepared pan.
- Par-bake the crust:
- Bake for 10 to 12 minutes until it is just starting to turn golden at the edges.
- Whisk the filling base:
- While the crust bakes, whisk together your eggs and cup of sugar until fully combined.
- Add the lemon magic:
- Stir in the lemon juice, zest, flour, baking powder, and pinch of salt until completely smooth.
- Assemble the layers:
- Pour the lemon filling over your hot crust, then sprinkle the reserved crumbs evenly across the top.
- Bake until set:
- Return to the oven for 20 to 25 minutes until the filling no longer jiggles and crumbs are lightly browned.
- The hardest part, waiting:
- Cool completely in the pan for an hour, then refrigerate for another hour before slicing.
- Finish with finesse:
- Dust generously with powdered sugar right before serving for that classic bakery look.
 Save
Save My sister called me at 9pm last month, halfway through making these for a work potluck the next morning, panicked because she forgot to chill them overnight. I told her to pop the pan in the freezer for 30 minutes, and she texted back saying they sliced perfectly and were the first thing to disappear.
Getting That Perfect Crumb Topping
I have learned that pressing some of the crust mixture into flat clumps between my fingers before scattering it on top creates those irresistible larger crumb bits. The trick is not to overwork it, you want those buttery, sandy chunks that stay tender instead of melting into a uniform layer.
Balancing Sweet and Tart
Every lemon has a different personality, and some are naturally more acidic than others. I always taste my filling before pouring it over the crust, adjusting with an extra tablespoon of sugar if it makes my mouth pucker too much. The goal is bright, not lip-puckering sharp.
Make-Ahead Magic
These bars actually improve after a day in the refrigerator, as the flavors meld and the crust firms up beautifully. I have made them two days ahead, wrapped the pan tightly in foil, and they tasted even better than fresh-baked.
- Wrap individual bars in parchment paper for grab-and-go breakfasts
- The crust stays firmer if stored in the refrigerator rather than at room temperature
- These freeze exceptionally well for up to three months if you need a dessert emergency stash
 Save
Save There is something about the way these bars manage to be both comforting and refreshing all at once that keeps me coming back to them. Hope they brighten up your kitchen like they have mine.
Recipe Guide
- → How long do these lemon crumb bars keep fresh?
These delicious bars can be stored in an airtight container in the refrigerator for up to one week. For best texture and flavor, enjoy them within a few days.
- → Can I make these lemon bars ahead of time?
Absolutely! The bars need to chill for at least 2 hours before slicing, making them ideal for preparing in advance. You can even bake them the day before serving.
- → What if I prefer a less sweet or more tart lemon filling?
You can easily adjust the sweetness by slightly increasing or decreasing the amount of granulated sugar used in the lemon filling to suit your personal preference.
- → How can I ensure my lemon filling is firm?
For a firmer lemon filling, consider adding 1 tablespoon of cornstarch to the lemon mixture along with the other wet ingredients before pouring it over the crust.
- → Can I use bottled lemon juice instead of fresh?
While fresh lemon juice is recommended for the best vibrant flavor, bottled lemon juice can be used as a substitute. However, the zest of a fresh lemon is crucial for aroma and depth.
- → Are there any variations I can try with this recipe?
Yes, for a delightful twist, you can substitute lime juice and zest for the lemon, creating delicious key lime crumb bars.