 Save
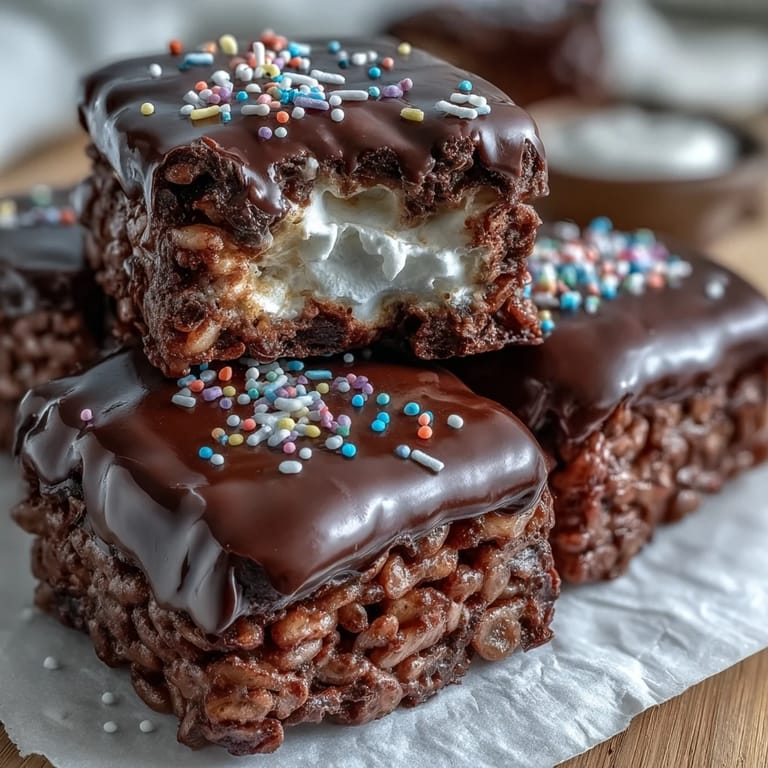
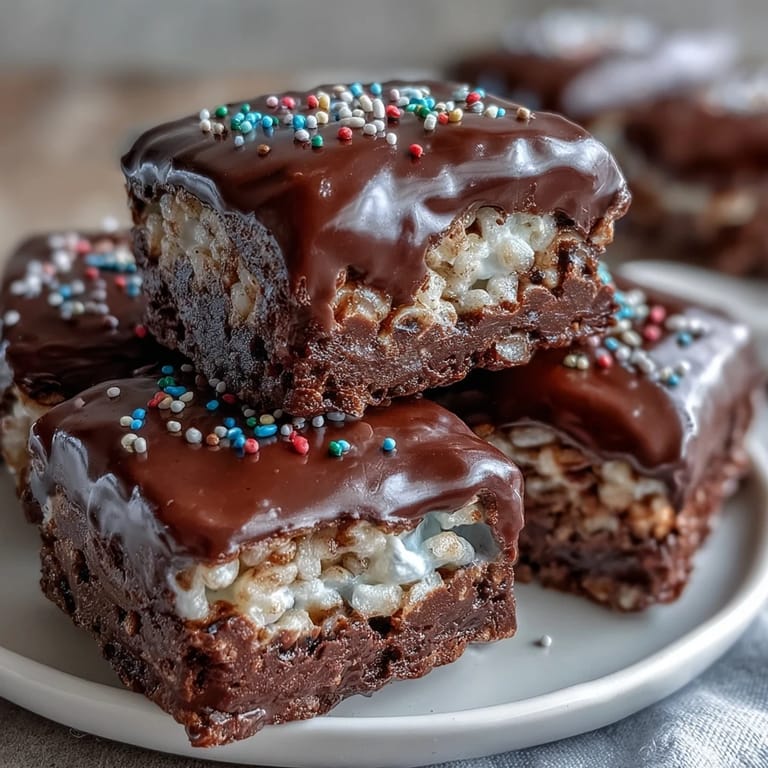
Save My sister showed up at my door last Sunday with a bag of marshmallows and that look in her eye that means we're making something messy and wonderful. We ended up making these chocolate covered Rice Krispy treats, and honestly the best part was fighting over who got to lick the chocolate spoon. They've become our thing now whenever we need an excuse to catch up and make the kitchen smell like butter and nostalgia.
Last summer I made these for my daughter's birthday party and watched them disappear in record time. One of the other moms asked for the recipe and when I told her how simple it was she actually laughed out loud. Sometimes the most crowd-pleasing treats are just the ones done right without any fuss.
Ingredients
- Unsalted butter: I always use unsalted so I can control the salt level myself plus grease the pan with extra
- Mini marshmallows: These melt so much faster and more evenly than the big ones trust me on this
- Rice Krispies cereal: The classic choice but make sure it's fresh for maximum crunch
- Fine sea salt: Just a tiny pinch cuts through all that sweetness and makes everything taste more balanced
- Semisweet or dark chocolate chips: Go for good quality here since the chocolate really shines through
- Vegetable or coconut oil: This makes the chocolate smoother and easier to spread
- Rainbow sprinkles: Totally optional but they make everything feel like a celebration
Tired of Takeout? 🥡
Get 10 meals you can make faster than delivery arrives. Seriously.
One email. No spam. Unsubscribe anytime.
Instructions
- Prep your pan first:
- Grease that square baking pan thoroughly with butter I also line mine with parchment paper for easy lifting later
- Melt the butter gently:
- Keep the heat low and stir constantly because burned butter will ruin everything and you'll be sad about it
- Add the marshmallows:
- Let them melt completely into the butter stirring until you have this smooth glossy mixture that smells like heaven
- Season and fold:
- Stir in that tiny pinch of sea salt then pour in the cereal and fold gently until every piece is coated
- Press firmly:
- Transfer to your pan and press down hard with buttered hands or a spatula compact is good here
- Melt the chocolate:
- Microwave in thirty second bursts stirring each time until smooth and glossy then add that teaspoon of oil
- Spread and decorate:
- Pour the chocolate over your cooled base spread it evenly and immediately add those sprinkles before it sets
- Let them set:
- Wait at least an hour at room temperature or speed things up in the fridge then cut into squares
 Save
Save These treats have saved me more times than I can count when I need to bring something to a potluck or just want to make my kids smile after a hard day. There's something about that chocolate cereal combo that just works every single time.
Getting The Chocolate Just Right
I learned the hard way that overheating chocolate makes it seize and turn into a grainy mess. Now I always stop microwaving when there are still a few lumps visible and stir to melt them the rest of the way.
Making Them Your Own
Sometimes I'll swap the semisweet chocolate for white chocolate and use crushed candy canes in winter. The base recipe is so forgiving that pretty much any chocolate and topping combo will work beautifully.
Storage And Serving Tips
These actually taste better on day two when everything has had time to settle together but good luck keeping them around that long. I always store them between layers of wax paper so they don't stick together.
- Cut them with a sharp knife that you've run under hot water for clean slices
- If it's really hot in your kitchen keep them in the fridge so the chocolate doesn't soften
- Package these up in cute boxes or bags for the easiest homemade gift ever
 Save
Save Hope these bring as much joy to your kitchen as they've brought to mine over the years. Happy baking friend.
Recipe Guide
- → How should I store these bars?
Store them in an airtight container at room temperature for up to 3 days. For a slightly longer shelf life, you can keep them in the refrigerator for up to a week, though they are best enjoyed at room temperature.
- → Can I use different types of chocolate for the topping?
Absolutely! While semisweet or dark chocolate chips are classic, you can experiment with milk chocolate, white chocolate, or even a combination. Adjust the oil slightly if using white chocolate, as it can sometimes be thinner.
- → What's the best way to get a smooth chocolate topping?
Ensuring your chocolate chips and oil are fully melted and glossy is key. Microwave in short bursts, stirring well between each. For a professional, tempered look, allow the melted chocolate to cool slightly to about 88°F (31°C) before pouring over the treats.
- → Are there any flavor variations I can try?
Yes! Stir ½ teaspoon of vanilla extract into the melted marshmallow mixture for added depth. For a festive twist, use white chocolate for the topping and pastel sprinkles. You can also mix in a teaspoon of peanut butter with the melted marshmallows.
- → How do I prevent the cereal mixture from sticking to my hands when pressing it?
The best trick is to lightly butter your spatula or the palms of your hands before pressing the mixture into the pan. This creates a non-stick barrier, making it much easier to achieve an even, firm layer without a mess.