 Save
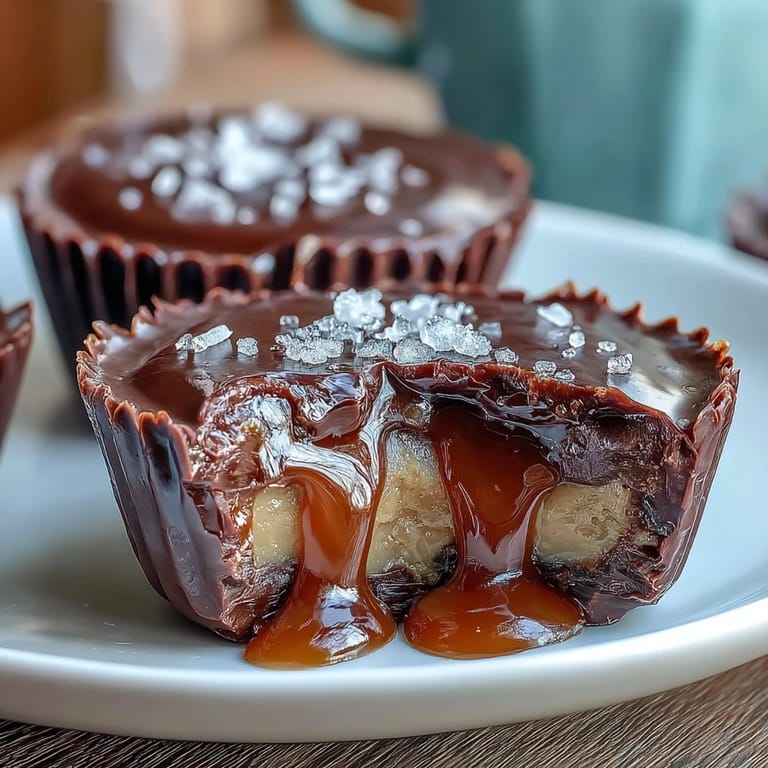
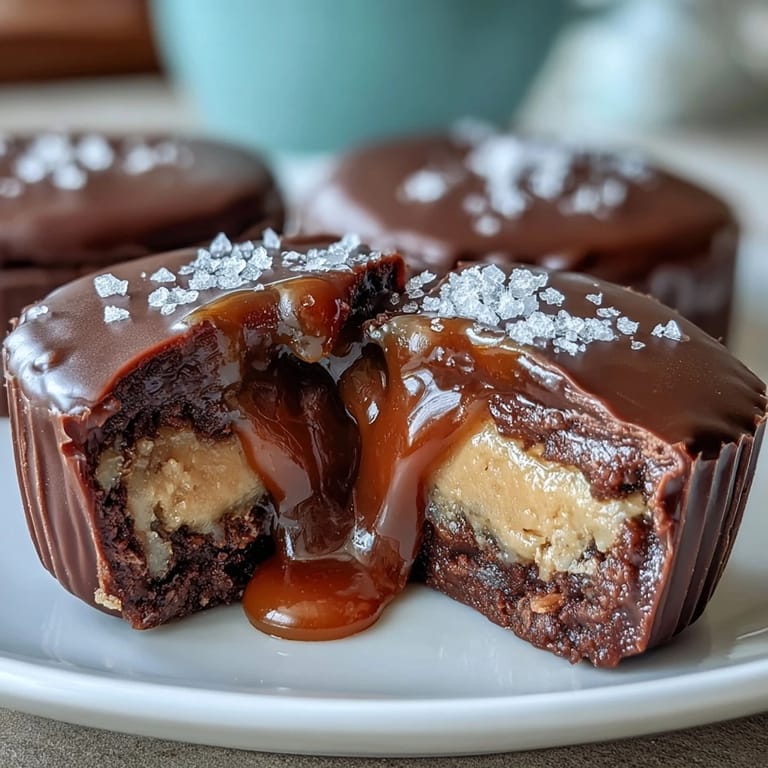
Save My sister once described homemade peanut butter cups as the reason she'd never buy the store version again, and I thought she was being dramatic until I made my first batch with salted caramel swirled inside. The kitchen smelled like melting chocolate and buttery caramel all at once, and watching that glossy chocolate coat the peanut butter filling felt like actual magic. When I bit into one and hit that sweet-salty caramel center, I understood her completely. There's something about making these yourself that transforms them from candy into an experience worth planning your week around.
I brought these to a work gathering last winter, tucked into a little box with parchment paper between each one, and watched someone's entire face light up when they took the first bite. They asked if I'd bought them from some fancy chocolatier, and I'm not going to lie, I let that moment sit for just a second before admitting the truth. By the end of the afternoon, three people had asked for the recipe, and one colleague actually texted me a week later saying she'd made them for her kids' teacher. That's when I realized these weren't just treats anymore—they were becoming memories for other people too.
Ingredients
- Semisweet or milk chocolate (300 g): This is where quality matters because you're tasting it as the primary flavor—chopped chocolate actually melts more evenly than chips in my experience.
- Coconut oil or unsalted butter (2 tbsp): This helps the chocolate flow smoothly into those corners of the liners without becoming thick, and coconut oil makes them slightly less greasy to the touch.
- Creamy peanut butter (120 g): The creamy version gives you that smooth mouthfeel, though I've successfully used natural peanut butter when I stir out excess oil first.
- Powdered sugar (2 tbsp): This sweetens the peanut butter filling without adding moisture, keeping the texture firm enough to hold caramel on top.
- Unsalted butter, softened (1 tbsp for filling): Softened is crucial here because cold butter won't blend smoothly into the peanut butter mixture.
- Vanilla extract (½ tsp): A small amount deepens the peanut butter flavor without making it taste artificial.
- Granulated sugar (100 g): The foundation of your caramel, and watching it turn from white to golden is oddly meditative if you don't stir it.
- Unsalted butter (2 tbsp for caramel): This adds richness and helps stabilize the caramel texture.
- Heavy cream (60 ml): The cream stops the cooking process and creates that silky smooth caramel consistency that makes this recipe special.
- Fine sea salt (¼ tsp for filling): This balances the sweetness within the caramel itself before the flaky salt topping.
- Flaky sea salt (for topping): The flakes create a textural contrast and visual appeal that makes these look professionally made.
Tired of Takeout? 🥡
Get 10 meals you can make faster than delivery arrives. Seriously.
One email. No spam. Unsubscribe anytime.
Instructions
- Prepare your station:
- Line a muffin tin with 12 paper liners and gather everything you'll need nearby because this moves quickly once chocolate hits the stove. I always set up a small plate for the finished cups so they have a designated place to chill without taking over the whole refrigerator.
- Melt chocolate gently:
- Using a heatproof bowl over simmering water is slower than the microwave but gives you more control and less risk of seizing the chocolate into graininess. If you use the microwave route, do 30-second bursts and stir between each one—the chocolate continues cooking from residual heat after you remove it.
- Create the chocolate base:
- Spoon about 1 tablespoon of melted chocolate into each liner, then tilt the cup slowly in all directions so the chocolate coats the entire bottom and creeps up the sides. Putting these straight into the freezer for 10 minutes ensures they set quickly and hold their shape when you add the filling.
- Mix the peanut butter filling:
- Combine the peanut butter, powdered sugar, softened butter, and vanilla in a bowl and stir until completely smooth and uniform in color. Divide this mixture into 12 roughly equal portions and flatten each one into a small disc about the size of a quarter—this surface area helps the caramel stick.
- Make your salted caramel:
- In a saucepan over medium heat, watch the sugar carefully as it melts; it will look crystalline for a moment, then suddenly turn golden as the edges begin to caramelize, and you gently swirl the pan to incorporate the unmelted sugar without stirring (stirring causes crystallization). Once it's a beautiful amber color, remove it from heat, add the butter, and stir until combined, then slowly pour in the cream—it will bubble and steam dramatically, which is completely normal.
- Whisk in smoothness:
- After the cream is added, whisk the caramel until it's completely smooth and any little bubbles have calmed down, then stir in your fine sea salt. Let this cool for about 10 minutes so it's warm but not hot when it meets the peanut butter layer—too hot and it'll melt your chocolate base, too cool and it becomes stiff.
- Assemble the layers:
- Remove your chilled chocolate cups from the freezer and place a peanut butter disc on top of each one, then carefully spoon about 1 teaspoon of cooled caramel onto the center of each disc. The caramel will pool slightly, creating that lovely glossy center you're after.
- Seal with chocolate:
- Reheat your remaining melted chocolate if it's solidified, then spoon a generous amount over each cup, using the spoon to smooth the top and seal in the filling underneath. Make sure the chocolate completely covers the peanut butter and caramel so nothing peeks out.
- Crown with salt:
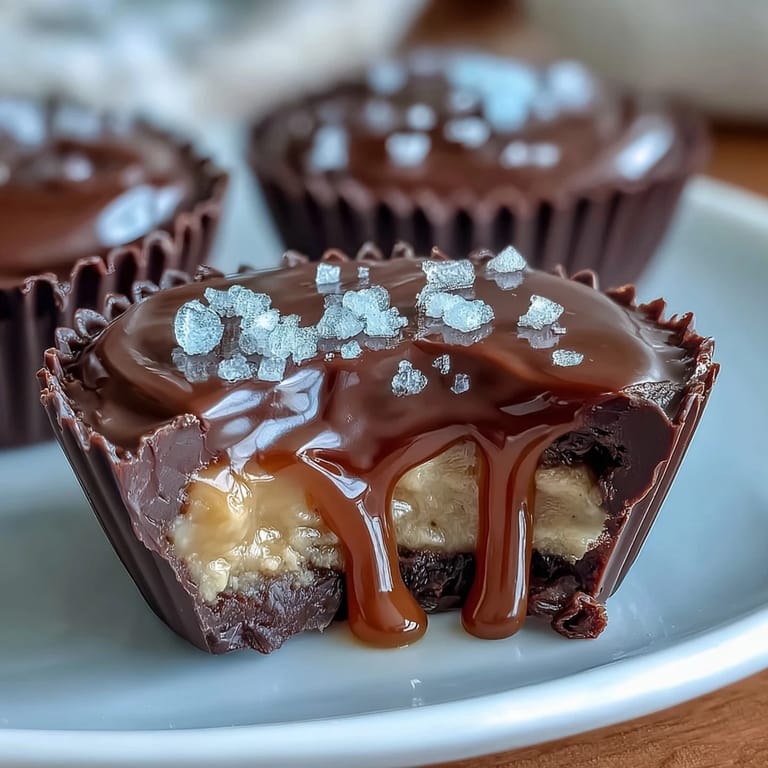
- While the chocolate is still slightly tacky, sprinkle a small pinch of flaky sea salt on top of each cup—the salt adheres to the chocolate and looks beautiful as it sets. Don't oversalt or they'll taste more like a pretzel than a candy.
- Final chill:
- Place the entire muffin tin in the refrigerator for at least 30 minutes until the chocolate is completely set and firm. You can test by gently pressing the edge with your thumb—if it feels solid and doesn't give, they're ready.
 Save
Save There's a moment near the end of making these, when you're looking at your 12 little cups crowned with flaky salt and catching the light in that chocolate coating, where you realize you've just created something that tastes like a luxurious experience but cost you just the time it took to melt some chocolate. That's when these stop being just a recipe and become a small act of care you can give yourself or share with someone.
The Salt Is Everything
I used to think flaky sea salt was just a garnish, something expensive chefs sprinkled on things for Instagram appeal. Then I made these cups without it the first time and handed one to a friend, and she said something was missing even though she couldn't name it—the salt was what she was searching for on her tongue. The sweetness of the caramel and chocolate actually needs that mineral sharpness to reach its full potential; it's like the salt wakes up all the other flavors and prevents everything from feeling one-dimensional. That's when I understood that this isn't a chocolate recipe with salt on top—it's a carefully balanced flavor conversation between sweetness, richness, and a whisper of salt.
Chocolate Temperature Matters More Than You Think
The first time I made these, I rushed the chocolate melting and ended up with a grainy, dull coating that looked sad next to the beautiful caramel center I'd worked hard to perfect. A friend who bakes professionally explained that when chocolate gets too hot, the cocoa butter breaks down and won't re-set smoothly, which is why those slow 30-second microwave bursts or the double-boiler method actually delivers better results than pushing things to melt faster. Now I treat the melting step like it deserves its own moment—not rushed, but deliberate—and the chocolate always sets into something glossy and snappable. It's a small shift in approach that transforms the entire final product from homemade-looking to genuinely professional.
Storage and Variations That Actually Work
These live beautifully in an airtight container in the refrigerator for up to a week, though honestly they rarely last that long in my house. The chocolate stays snappy and the caramel stays creamy because the cold keeps everything set without drying anything out. I've experimented with additions—a tiny pinch of cinnamon in the caramel tastes like autumn in chocolate form, and swapping the peanut butter for almond butter creates a completely different flavor profile that's somehow even more elegant.
- Store these in the coldest part of your refrigerator and they'll maintain their texture and flavor for the full week.
- If you want to make a nut-free version, sunflower seed butter creates a lovely earthier taste that pairs beautifully with the salted caramel.
- A dusting of cinnamon added to the caramel opens up warm spice notes that make these feel like a fall treat even if it's summer.
 Save
Save These peanut butter cups have become my answer to the question of what homemade gift actually matters, because unlike most treats, these are genuinely better than what people can buy. Every element—the gooey caramel, the salted chocolate, the peanut butter center—comes together to create something worth making again and again.
Recipe Guide
- → How do I prevent the chocolate from seizing?
Ensure the chocolate melts slowly over gentle heat or in short microwave bursts, stirring frequently to keep it smooth.
- → Can I substitute peanut butter with another nut or seed butter?
Yes, almond or sunflower seed butter can be used to accommodate different dietary needs or preferences.
- → What is the purpose of chilling the cups?
Chilling helps the chocolate set firmly and the caramel to thicken, resulting in a neat, stable treat.
- → How can I add a twist to the salted caramel?
Adding a pinch of cinnamon or a splash of vanilla extract can enhance the caramel’s flavor and depth.
- → How long do the cups stay fresh in the fridge?
Stored in an airtight container, they stay fresh for up to one week when refrigerated.