 Save
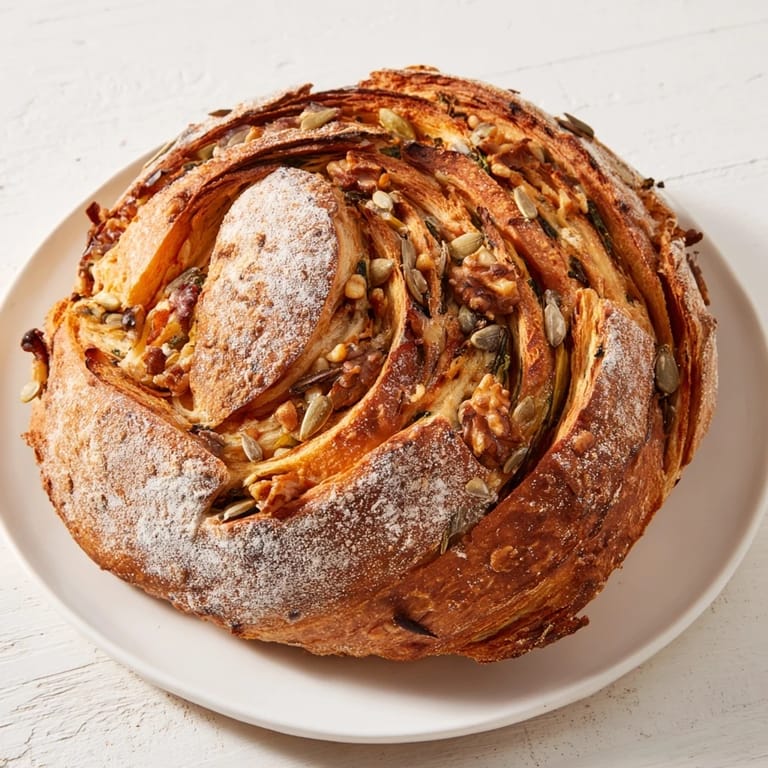
Save I still remember the afternoon I discovered the Fibonacci spiral while watching clouds drift past my kitchen window. The pattern seemed to repeat itself in everything—the way cream swirled in my coffee, the unfurling of fern fronds in my garden. That's when it struck me: why not bake this mathematical beauty into bread? I spent weeks experimenting, layering ingredients in increasing portions, and the first time I pulled that golden, spiral loaf from the oven, I understood why ancient bakers were called artists. This bread isn't just food—it's edible geometry, a meditation on growth made tangible.
I baked this for my sister's birthday brunch, and watching her face when she first saw the spiral on the table—that moment of pure delight before she even tasted it—made every hour of rising and shaping worthwhile. She sliced it carefully, revealing the rings of ingredients spiraling outward like tree rings marking time. By the end of brunch, we were all sneaking extra pieces, and she asked me to teach her the technique so she could make it for her book club. That's when I knew this recipe had become something I'd be making for years.
Ingredients
- Strong bread flour (500 g): This is your foundation—the high protein content develops gluten networks that support the spiral structure. I learned the hard way that all-purpose flour creates a loaf that slumps instead of stands tall and proud.
- Water, lukewarm (350 ml): Lukewarm means it should feel slightly warm to your wrist, never hot. Temperature matters because it helps the yeast wake up gently, coaxing slow fermentation that builds flavor.
- Sourdough starter, active (100 g) or instant yeast (7 g): If you have a living starter, use it—the complexity it brings is worth the longer fermentation. If not, instant yeast works beautifully too. Just know that sourdough will give you a deeper, more nuanced crust.
- Fine sea salt (10 g): Don't skip this or reduce it thinking it's unhealthy. Salt strengthens gluten, enhances flavor, and controls fermentation speed. I use fine sea salt because it dissolves evenly into the dough.
- Olive oil (15 ml): A modest amount keeps the dough supple and the crumb tender. It also helps your hands during shaping—everything glides more smoothly.
- Toasted sunflower seeds (20 g): Toast them yourself if possible. The warmth in the kitchen activates their nuttiness and ensures they stay crisp rather than softening into the crumb.
- Chopped walnuts (30 g): Walnuts bring earthiness and a gentle bitterness that plays beautifully against the cheese layer coming next. Chop them roughly so they don't pulverize.
- Pumpkin seeds (40 g): I love these for their subtle sweetness and the way they add visual interest to the sliced cross-section. They hold their shape through baking.
- Grated hard cheese—Gruyère or Parmesan (50 g): Freshly grated, never pre-shredded. The way it melts into the dough creates pockets of umami that make people ask what your secret ingredient is.
- Chopped sun-dried tomatoes, drained (60 g): Drain them thoroughly or your dough becomes too wet. Their acidity brightens everything, and they provide little bursts of concentrated tomato flavor.
- Mixed olives, pitted and chopped (70 g): Use olives you actually enjoy eating—they're not a supporting character here. Their brininess becomes more pronounced as the bread cools.
- Sautéed spinach, well-drained (80 g): This is the final, largest layer. Sauté it first, then press it against a clean kitchen towel until it releases every drop of moisture. Wet spinach ruins the dough structure.
Tired of Takeout? 🥡
Get 10 meals you can make faster than delivery arrives. Seriously.
One email. No spam. Unsubscribe anytime.
Instructions
- Mix flour and water, then rest (autolyse):
- Combine 500 grams of flour with 350 milliliters of lukewarm water in a large bowl. You'll have a shaggy, flour-streaked mixture that looks nothing like dough yet. This is exactly right. Cover the bowl with a damp kitchen towel and let it rest for 30 minutes. During this time, the flour gradually absorbs water and gluten strands begin forming on their own—this autolyse period is why your final dough will be so extensible and strong.
- Activate the starter and build the dough:
- Sprinkle 100 grams of active sourdough starter (or 7 grams of instant yeast if you prefer) over the rested flour and water, then add 10 grams of fine sea salt and 15 milliliters of olive oil. Using your fingers or a wooden spoon, work everything together until a sticky, shaggy dough forms. It will feel almost too wet—trust the process. Transfer to a lightly floured surface and knead gently for 8 to 10 minutes, using the heel of your hand to push the dough away from you, fold it back over itself, rotate, and repeat. You're looking for a dough that's smooth, elastic, and springs back when you poke it.
- First rise—patience is the secret ingredient:
- Place your newly kneaded dough into a lightly oiled bowl, cover with a damp towel or plastic wrap, and leave it at room temperature. If it's warm in your kitchen, 8 hours might be enough. If it's cooler, give it 10 to 12 hours. The dough should roughly double in volume and develop a webbed texture on the surface. During this long fermentation, the flavor deepens, the crust potential strengthens, and wild yeasts begin their quiet work.
- Divide the dough into seven spiraling portions:
- Turn your fermented dough onto a lightly floured work surface. Using a dough scraper or knife, divide it into 7 roughly equal pieces. These seven pieces will become your seven spiral rings, each one a different chapter in the flavor story. Keep them loosely covered as you work so they don't dry out.
- Layer in the ingredients with increasing generosity:
- Here's where the Fibonacci magic happens. Take the first small portion of dough and gently knead 20 grams of toasted sunflower seeds into it until they're distributed. This requires patience—work gently so the gluten doesn't break down. Set it aside. Take the second portion and knead in 30 grams of walnuts. Then comes the third with 40 grams of pumpkin seeds, followed by the fourth with 50 grams of grated cheese. The fifth receives 60 grams of drained sun-dried tomatoes—really work them in so the acidity disperses. The sixth gets 70 grams of pitted olives. Finally, the largest, seventh portion embraces 80 grams of well-drained sautéed spinach. Each portion grows slightly larger in weight and more densely flavored.
- Shape the spiral on your canvas:
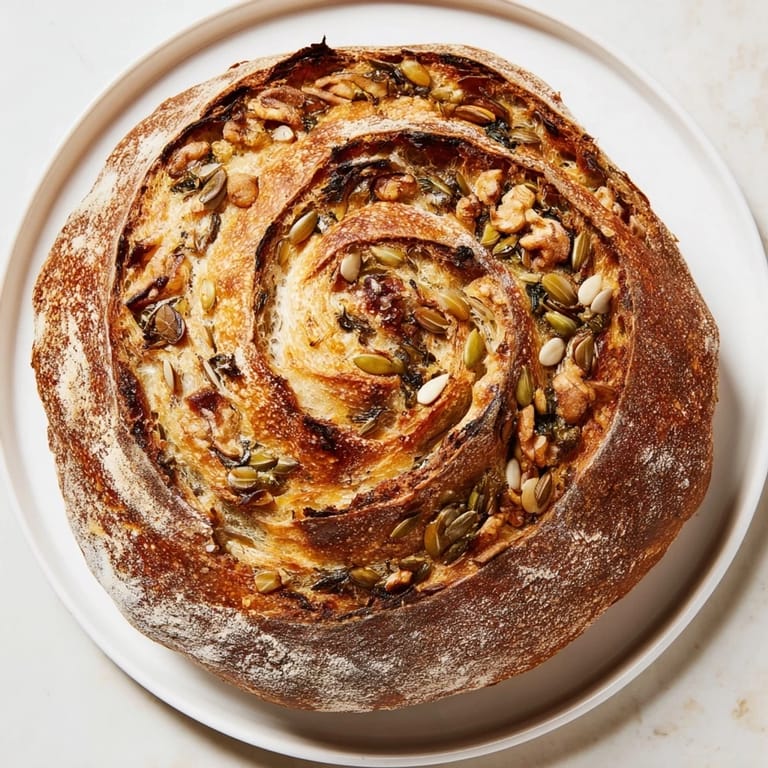
- Roll each ingredient-filled dough portion into a rope approximately 8 to 10 inches long. Place a sheet of parchment paper on your baking sheet—this is your canvas. Begin with the smallest rope (sunflower seeds) and coil it tightly around a central point in the middle of the parchment. As if drawing an ancient symbol, wrap the walnut rope around it, then the pumpkin seed rope, expanding outward. Continue spiraling outward with cheese, tomatoes, olives, and finally spinach, creating a perfect mathematical spiral where each segment is slightly larger than the last. Press the very end where the spinach rope finishes into the dough to seal it.
- Second rise—watch for the puffy signal:
- Cover your spiral loosely with a damp towel or plastic wrap and let it rise at room temperature for about 1.5 hours. You're watching for the dough to become puffy and slightly domed, with visible air bubbles beneath the surface. It shouldn't double in height—just enough lift to signal it's ready for heat.
- Prepare the oven for steam and crust:
- Position your oven rack in the lower third and place an empty baking tray or cast-iron pan on the very bottom. Preheat your oven to 230 degrees Celsius (445 degrees Fahrenheit). The steam that will be created is crucial—it keeps the crust soft during the early baking stages, allowing maximum expansion before hardening into that beautiful, crackling exterior.
- Score with intention:
- Just before baking, dust your spiral lightly with flour for contrast and clarity. Using a sharp bread lame, razor blade, or even a very sharp serrated knife, make bold, confident slash marks along the spiral lines. These slashes relieve pressure, guide expansion, and become the gorgeous caramelized ears you've seen on bakery loaves. Don't be timid—slash about one-quarter inch deep.
- Create steam and bake:
- Carefully pour a cup of boiling water into the preheated tray on the oven bottom—step back from the steam rush. Quickly place your spiral bread on the center rack and close the oven door. Bake for 40 minutes total, rotating the baking sheet halfway through for even coloring. The loaf is done when it's deep golden brown, the surface is crispy to the touch, and it sounds hollow when you tap the bottom. The interior temperature should reach 208 to 210 degrees Celsius if you have a thermometer.
- Cool before the first slice:
- This is hardest part for me—letting the bread cool completely on a wire rack before slicing. But those final minutes of cooling set the crumb structure, allowing it to firm up enough to slice cleanly without compressing. If you cut too early, you'll get a gummy interior. Wait at least 2 hours if you can manage the patience. I usually slice mine the next morning.
 Save
Save The moment I understood this recipe fully was when my neighbor—a baker herself—came over, tasted a slice, and immediately asked to try making it. She brought her family the next week to see the spiral, and for those few hours, bread became the reason people gathered. It wasn't fancy restaurant food or restaurant technique. It was home, made beautiful through patience and the joy of feeding people.
The Story Behind the Spiral
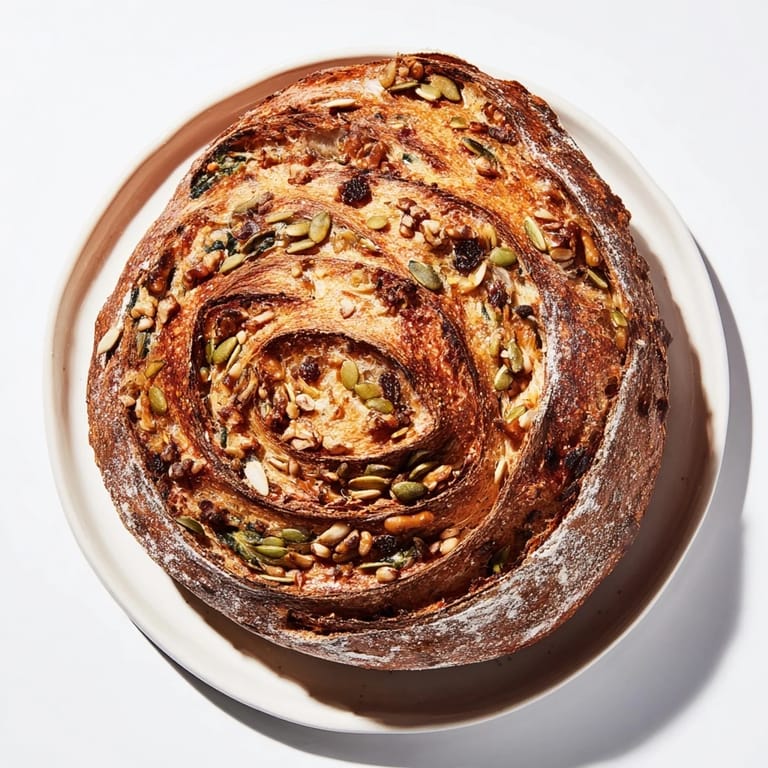
Fibonacci spirals appear everywhere in nature if you start looking for them—sunflower seed heads, nautilus shells, hurricanes, galaxies. There's something deeply satisfying about baking mathematics into bread, about holding an edible representation of nature's favorite pattern. When I first read about Fibonacci sequences in a dusty cookbook, I was struck by the idea that humans have been using these ratios in food for centuries without always knowing the name. This recipe feels like a conversation between ancient wisdom and modern curiosity. Every time you bake it, you're participating in something that connects you to nature's blueprint.
Choosing Your Ingredients Wisely
The beauty of this spiral bread is that it's a framework, not a prison. While I've suggested specific ingredients that work beautifully together, you can absolutely substitute based on what you love or what your pantry holds. Hate olives? Replace them with sun-dried cranberries or chopped dates. Don't have Gruyère? Any aged hard cheese works—aged cheddar, Pecorino Romano, or even smoked cheese for something unexpected. The rule is simple: keep the weight increasing in each layer (20, 30, 40, 50, 60, 70, 80 grams), keep the flavors complementary, and drain anything wet thoroughly. I've made versions with roasted garlic and herbs, with everything bagel seasoning mixed through, and even with a layer of za'atar and pine nuts. The spiral structure remains magical regardless.
Troubleshooting Your Spiral
Sometimes things don't go exactly to plan, and that's where experience becomes your teacher. If your dough refuses to hold a spiral shape and keeps collapsing, you've likely got too much moisture in the mix or your spinach wasn't properly drained—remember, even a tiny bit of hidden water sabotages everything. If the bread bakes too pale, your oven might run cool, so consider investing in an oven thermometer and baking slightly longer. If the crumb is too dense, next time extend your bulk fermentation by 2 to 4 hours—slow fermentation creates better structure and flavor. And if your spiral loses definition during baking and the rings blur together, it means you weren't confident enough with your shaping. It's okay. Reshape with more intention next time, pressing the layers together more firmly as you coil.
- Keep an oven thermometer in your oven at all times—trusting the dial is how bread dreams get broken.
- Steam is your friend for crust development, but too much creates a pale, soft loaf. One cup of water is usually perfect.
- If you're baking at high altitude or in a very dry climate, your dough might proof faster. Watch it, not the clock.
 Save
Save Baking this bread is less about following instructions and more about learning your kitchen, your hands, your oven. The first time will be revelatory; the second time will be easier. By the third or fourth spiral, your body will remember the feel of the dough, the right texture, the exact moment everything comes together. That's when bread stops being a recipe and becomes part of who you are in the kitchen.